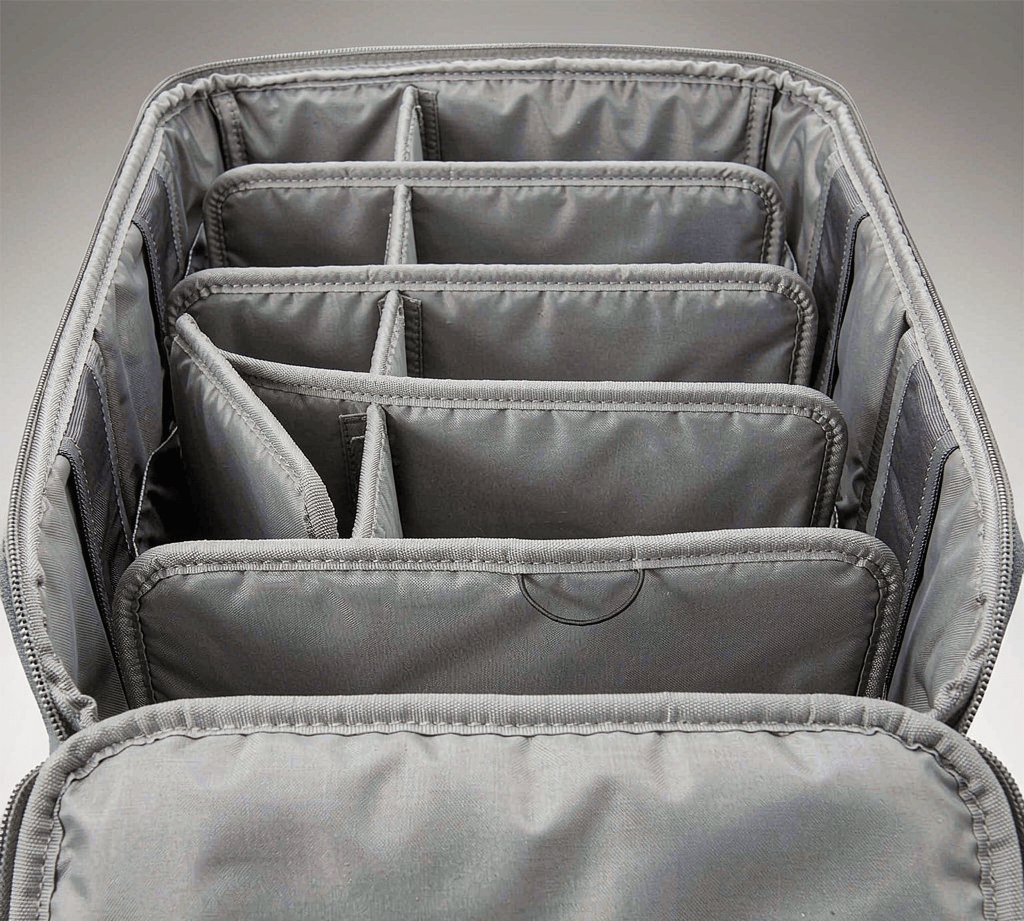
A plain open cavity looks fine in a catalog, but on a real job site or photo shoot it turns into a pile of rubbing parts. Internal dividers are the panels, fixed or removable, that split a bag’s main compartment into sections so items stay separated, protected, and quick to find. For brands building organizer cases, camera bags, tool rolls, or medical kits, the divider layout is often what sells the bag. The good news is that it is a spec you can write down in a few lines, and a factory can build to it repeatably.
Why dividers earn their place
A divider does three jobs at once. It stops hard items from scratching each other, it keeps smaller pieces from sinking to the bottom, and it lets the same shell serve several product variants just by swapping the insert. For a private-label program that means one outer mold can support a camera version, a tool version, and a medical version. That flexibility is usually cheaper than tooling three separate bags.
Panel types buyers actually specify
Fixed sewn panels are stitched straight into the lining. They are the cheapest and most durable option, but permanent. Removable panels use hook-and-loop or snaps so the end user can reconfigure the layout, which is handy for camera and tool bags where loads change daily. A grid system adds loops or slots on the shell wall so panels slide in anywhere; it costs more but reads as premium. Framed dividers sandwich a thin PE or aluminum sheet so tall items stand upright instead of flopping over.
Materials and padding
Most dividers are a face fabric over a thin foam or EVA core, finished with the same lining used elsewhere in the bag. The core thickness is the number that matters: 3 to 5 mm is enough to stop scuffs, while 8 to 10 mm is what you want between fragile optics and a wrench set. If you are already specifying the bag’s main padding, keep the divider core in the same family so the hand-feel stays consistent. Our guide to foam padding specs covers the core densities worth putting on a tech pack.
The divider face fabric should match the lining fabric guide choices you made for the rest of the interior, or the two materials will wear at different rates and look patchy after a few months.
Interior fittings like a key leash belong in that same interior plan. Specify the clip and tether length early so it is not bolted on as an afterthought.
Attachment methods
Hook-and-loop is the default for removable panels because it is cheap and repositionable, but specify the loop pile density or panels drift under load. Snaps and side-release clips hold firmer and survive being yanked, which matters for heavy tool inserts. Channel systems sew a sleeve into the wall and slide a panel edge in; the look is clean, but the channel must be sewn straight or panels bind.
The same hardware logic reaches smaller details elsewhere in the bag. The zipper pull tab is a spec item in its own right, with material and logo requirements that belong in the build sheet.
How to write the spec line
A usable divider spec has four numbers: panel count, each panel’s height and width, core thickness, and attachment type. Add the face fabric and any printed logo, and the factory can quote and build without a call. Cutting those panels to size is the same process as any other flat component, so the notes in our panel cutting methods article apply directly.
When a compartment wall needs to hold shape rather than just divide, the build overlaps with gusset construction, where a structured side wall does the separating.
Common mistakes
The usual errors are too few anchor points, so panels sag, loop pile that is too thin, so panels peel off, and cores so thick the bag will not close. A quick pre-production sample with the real load inside catches all three. Every divider decision, panel count, material, and attachment, belongs on the tech pack so reorders match the first run.
FAQ
Should dividers be fixed or removable?
Fixed sewn panels are cheapest and toughest; choose removable hook-and-loop or grid systems when users reconfigure loads often, such as camera or tool bags.
How thick should a divider core be?
3 to 5 mm stops scuffs between soft items; 8 to 10 mm protects fragile gear. Match the core to the items you actually carry, not a round number.
What attachment holds up best?
Snaps and clips survive pulling better than hook-and-loop, but specify loop pile density or removable panels drift under heavy loads.
Do dividers add much to unit cost?
A fixed sewn panel adds little; removable grid or framed systems cost more in hardware and labor but let one shell serve several product variants.